Reseller Guide
Overview
- Development Plans
- Reseller Program
- Reseller Support Plans
- Useful Resources
Getting started
- Subscription
- Choosing domain name for your Reseller website
- Setting up your DNS
- Setting up your environment
Admin Panel
- Entering your Administrative Account
Branding
- Site Name
- Changing your Reseller Site Logo
- Changing your Reseller Site Colors & Images
- Creating & Managing Menus
- Localization
- Socialize
Payments
- Creating your PayPal payment button
Management
- Users management
- Apps management
- Builds management
- Templates management
- Modules management
Advanced
- Working with remote server
- Customizing your Reseller Web Site
- Changing your Web Site Style
- Adding menu to your Template
- Changing your site Logo
- CSS Cook Book
- CONCLUSION
You can personalize your website design by adding images and logos, or customize certain elements of the site via FTP.
NOTE: An FTP client is a program installed on your computer that allows managing files on remote server(s).
You can access your website via FTP using specialized file manager software like FileZilla (http://filezilla-project.org) or Total Commander (http://www.ghisler.com).
Look for a confirmation email from iBuildApp at the email address you provided - you'll find credentials for your FTP (if you did not, contact [email protected]). Set up your FTP connection.
If you do not know how to set up your FTP client please refer to the official documentation:
- FileZilla: http://wiki.filezilla-project.org/Documentation
- Total Commander: http://www.ghisler.com/faq.htm
Basically, the process of working with your FTP client on your website boils down to the following prerequisites:
- Open the client,
- Enter your website's host name, username and password,
- Click the "Connect" button to access the contents of your server directories.
There are two folders accessible under your account:
- "design" where you can store your CSS files and media files e.g. pictures. The folder contains 2 files: logo.png and style.css
Editing your style.css, you can change the way the site is displayed, including your font sizes, background colors and images, and so on. You can upload more media files and change the logo.png to customize logo on your site.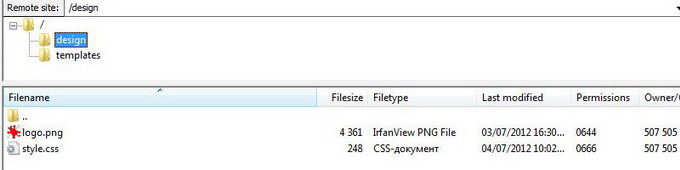
- templates" that contains templates for your website:
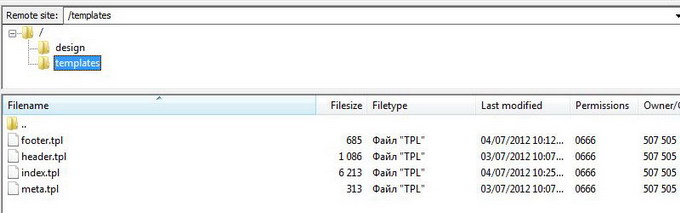


"header.tpl" file is responsible for the header of internal pages:
"footer.tpl" is responsible for the footer of internal pages:
"index.tpl" is responsible for the main page in general, including header and footer sections.
"meta.tpl" is a service file for meta keywords and .css files.
To change appearance of your website you need to make changes in the following files:
- Header.tpl
- Footer.tpl
- Index.tpl
- Styles.css
- Style_new.css
Please NOTE that page header and footer are embedded into the index page. To get all website pages having the same header and footer you need to change all 3 files:
- header.tpl,
- footer.tpl, and
- index.tpl.
To keep the ability to edit menu from your Admin Panel you need to include to the following files:
- header.tpl,
- footer.tpl, and
- index.tpl.
The following tags:
- {$M_MENU} - main menu (at the top of the page)
- {$B_MENU} - footer menu (at the bottom of the page)
Place those tags where you would like to see menu output.
A quick way to change the logo on your website is create a .png image (200px width and 70px height) and replace the existing one:
- Open your FTP client, enter FTP access details, and connect to the server where your website is installed.
- Locate the file with the logo in the appropriate folder. Then open the directory on your computer where your custom logo file is located, rename it to logo.png to avoid changing the reference to the logo file in templates.
- Upload your custom logo to the server.
If you need more customization than Admin Panel provides, we recommend using CSS facilities. The following tips will help you to customize your website via CSS.
The styles, listed below, are placed in new_style.css that is available via FTP. You can add extra styles you need. You can also use style.css file to create your own styles.
Logo
A quick way to change the logo on your website is create a .png image (200px width and 40px height) and replace the existing one:
- Open your FTP client, enter FTP access details, and connect to the server where your website is located.
- Locate the logo file on the server, then locate an image on your computer, rename it to logo.png (to avoid changing the reference to the logo file in templates).
- Upload your custom logo to the server.
If you would like to use an image located on remote server, change the style as shown below:
#logo, #main_nav li #logo {

   background: url(REMOTE_SERVER/logo.png) no-repeat scroll 0 0 transparent;

}
The example below shows how to change logo's width and height:
#logo, #main_nav li #logo {

   height: 100px; //change logoheight

   width: 250px; //change logo width

}
NOTE: We recommend using .png images with transparent background.
Header
A quick way to change the header background on your website is create a .png image (minimum 1px width and 67px height) and replace the existing one:
- Open your FTP client, enter FTP access details, and connect to the server where your website is located.
- Locate the background file on the server. Then locate background image on your computer, rename it to top_bar_bg.png (to avoid changing the reference to the logo file in templates).
- Upload your image to the server.
If you would like to use an image located on remote server, change the style as shown below:
#header .top_bar {

   background: url(REMOTE_SERVER /top_bar_bg.png) repeat-x;

}
NOTE: you can use any image type: .jpg, .png, .gif
The example below shows how to change header width and height:
#header .top_bar {

height: 100px; //change header height

}

.wrap {

   width: 1004px; //change header width

   margin: 0 auto;

   position: relative;

}
If you would like your header to fit the page width, include this code:
#header .top_bar {

   margin: 0 auto;

   width: 1004px; //change header width

}
Header menu
To customize your header menu appearance, use the following styles:
#main_nav li a {

   height: 40px;

   padding: 0px; //no indent between the items

   font: 10px/40px Arial, Helvetica, sans-serif; //set font size

   color: red; //red color of the menu items

   text-shadow: 0 1px 0 rgba(255,255,255,0.6);

   display: block;

}
To get rid of borders in the menu:
#main_nav li {

   height: 40px;

   border-right: none; //no borders In menu line

   float: left;

}
Second level header menu
The following example describes how to customize second level menu box:
.sub-menu {

   background: #EFEFEF !important; //box beckground

   border: 1px solid #fff; //box border

   -webkit-border-radius: 8px; //box border radius

   -moz-border-radius: 8px; // box border radius

   border-radius: 8px; // box border radius

   position: relative;

   padding: 6px 0 !important;

}

.sub-menu: after {

   background: url(/media/img/submenu_ugol.png) no-repeat 0 0; //upper arrow

   position: absolute;

   width: 24px; //arrow width

   height: 13px; //arrow height

   top: -13px; //arrow top position

   left: 20px; //arrow left position

   margin-left: -12px;

}
To edit an item of second-level menu, use the following code:
#main_nav li a {

   height: 40px; //height od the ongle item

   padding: 0 28px;

   font: 16px/40px Arial, Helvetica, sans-serif;

   color: #000; //font colour

   text-shadow: 0 1px 0 rgba(255,255,255,0.6); //text-shadow

   display: block;

}
Language toggle
Language toggle
Change the position of language toggle control:
#header .lang_switch {

   float: right; //the box floats to the right

   margin: 5px 30px;

   padding-right: 175px; //shift on the right

}
Customize appearance of the current language box:
#header .lang_switch li {

   background-color: #A0B0B6;

   background-image: -o-linear-gradient(top, #A0B0B6, #637881);

   background-repeat: repeat-x;

   border-radius: 4px;

   box-shadow: inset 0px 2px 3px rgba(0, 0, 0, 0.298);

   display: block;

   position: relative;

}

#header .lang_switch a {

   background: url("/images/lang_arrow2.png") 95% 55% no-repeat transparent; //change    this image to change default arrows

   color: #FFFFFF;

   display: block;

   font-size: 12px;

   line-height: 1.8;

   margin: 3px 0px 0px;

   padding-left: 5px;

   padding-right: 20px;

   text-decoration: none;

   text-shadow: 0px 1px 0px rgba(0, 0, 0, 0.298);

}
Social icons
To customize social icons presented on your website, create 3 images (56 px width & 58 px height each) and upload them to the server via FTP. Then modify styles as shown below:
#header .social_icons_new .facebook {

   background: url(images/facebook.png);

}

#header .social_icons_new .twitter {

   background: url(images/twitter.png);

}

#header .social_icons_new .rss {

   background: url(images/rss.png);

}
To hide the social block, modify the style as shown below:
#header .social_icons_new a {

   display:none; //hides the the social block

   float: left;

   width: 56px;

   height: 58px;

   background: url(images/sprite.png);

   margin: 0 5px;

}
Footer
To change background color for the footer area, create a .png image and replace existing one:
- Open your FTP client, enter FTP access details, and connect to the server where your website is located.
- Locate the background file on the server. Then locate background image on your computer, rename it to footer_pattern.png (to avoid changing the reference to the logo file in templates).
- Upload your image to the server.
If you would like to use an image from remote server, change the style as shown below:
#footer _int {

   background: url(REMOTE_SERVER / footer_pattern.png) repeat-x;

}
NOTE: for your background, you can use any image type: .jpg, .png, .gif
The following example shows how to change width and height of the footer area:
#footer_int .wrap {

   background: url(images/footer_shadow.png) no-repeat center top; //upper footer shadow

   padding: 22px 0;

}

.wrap {

   width: 1004px; //footer width

   margin: 0 auto;

   position: relative;

}
{t}If you want the footer area to fit the page width, include the following code:{/t}
{literal}#header .top_bar {

   margin: 0 auto;

   width: 1004px; //change header width

}
Footer menu
The CSS code as shown below describes the footer menu area:
#footer_int #footer_nav li {

   float: left;

   height: 12px;

   border-left: 1px solid #6f657d; //devider on the left

   padding: 0 12px;

}
CSS rule for footer menu item:
#footer_int #footer_nav li a {

   color: #75727a; //item color

}
Create app button
Customize "Create New App" button:
.border-gradient-title .border-center {

   display: inline-block;

   z-index: 10;

   position: relative;

   margin: 0 auto;

   width: auto;

   background-color: #fff; //background image

   padding: 0 10px;

}

.btn_border {

   padding: 9px;

   padding-bottom: 12px;

   border: 1px solid #DFDFDF; //background image

   -webkit-border-radius: 4px;

   -moz-border-radius: 4px;

   border-radius: 4px;

}

.btn_create_orange {

   font-size: 18px; //text color

   text-transform: uppercase;

   padding: 8px 20px 6px 13px;

   box-shadow: 0px 3px 0px #DB430D; //box shadow

   border: 0px;

   baclground: red; //box background

   -webkit-box-shadow: 0px 3px 0px #DB430D; //text shadow

}
Creating site template from the scratch
You can create a template for your website from the scratch. To make sure all functionality is working with your custom template, follow the rules below:
- We use SMARTY to work with the templates, so your template should be created in SMARTY style.
- To make your template working, you have to upload 4 mandatory files to Templates folder:
- Index.tpl - the main page
- Header.tpl - the site header
- Footer.tpl - the site footer
- Meta.tpl
- To keep the ability to edit menu from your Admin Panel you need to include the tags:
- {$M_MENU} - main menu (at the top of the page)
- {$B_MENU} - footer menu (at the bottom of the page)
- Header.tpl
- Footer.tpl
- Index.tpl
- To keep the ability switching languages, include this code into your index.tpl & header.tpl files :
{include file="common/reseller/lang_switch.tpl.php"}
Localizations created in your Admin Panel will be used for your site. - To keep the ability editing Facebook & Twitter settings from your Admin Panel, use the following keys in your links:
- #facebook#
- #twitter#
Now you know how to customize your reseller front, manage your customer base, publish apps for your clients, manage templates
As you build a solid customer base and continue to cater to your customers, you are building a strong, lasting foundation for continued success as a reseller of iBuildApp services.